- Get link
- X
- Other Apps
Thank you, "College Info Geek," for allowing me to use this Blog post!
The Ultimate Guide To Building A Personal Website
C.I.G. is supported in part by its readers. If you buy through our links, we may earn an affiliate commission.
Read more here.

This guide was originally published in March 2012. Since then, hundreds of students (and even non-students!) have created their own personal websites using it. As it is one of the most-viewed articles on College Info Geek, I keep this guide very up-to-date, and it’s current for January 2022.
What’s the #1 networking tool you can have in your arsenal as a student? I’ll tell you this right now: it isn’t your resume.
Resumes are boring. Career experts tell you to make your resume a one-page, size 11 Time New Roman document printed with black ink with no pictures. Seriously? How are you supposed to represent — and differentiate – yourself with that?
Plus, your resume becomes static and outdated the moment you hand it to someone. You can’t update resumes you’ve already given out – you have to make new copies.
That’s why you need to create a personal website.
A website is the complete opposite of a resume. Everything bad about resumes can be fixed simply by having a website. I’d go as far as to say that not having a website is like shooting yourself in the foot – it’s that useful.
4 Reasons Why You Need to Make a Personal Website
1) A website isn’t static; it’s dynamic. It’s ever-changing. The moment you accomplish something, you can add it to your website. When you complete a project, you can put it in your portfolio for all to see. You don’t need to print new copies of it and send it out to your contacts over and over; you just update it. People can continually come back and see what you’re up to.
2) Having a website makes you more findable. If all you have is a resume, you have to go out and hand it to people to get your name out. If someone wanted to look you up on the internet and you didn’t have a website, all they might get is a Facebook or Twitter profile.
However, if you have a website, you can be found by a much wider audience and control what it is they see first. This is key for establishing your personal brand and for highlighting your accomplishments.
I’ve been offered jobs, met clients for my web design work, and gotten interviews simply because I have a website. If I didn’t take the time to create one, I’m confident that I wouldn’t have been found.
Make sure you can be found!
3) Not many people have one. Personal websites may be more common in 2022 than they were ten years ago, but the vast majority of students and job seekers are still relying on resumes and job search websites.
Succeeding today requires that you make yourself stand out, and having a website can help you do that. It shows that you’ve taken the time to learn how to do something fairly technical, and it shows that you have some skills other people don’t have.
4) You gain some new skills that can be very useful in the future. Learning how to build a website involves a number of different skills, especially if you get into customizing and optimizing things. Even if you’re not looking for a job in a tech field, having these skills can give you a leg up.
Say you’re applying for a job in advertising. If you can tell the interviewer that you’re not only a great marketer, but that you also have knowledge of the web, you become a much more attractive candidate.
Convinced Yet?
I sure hope so, because this guide is going to teach you exactly how to build that awesome website!
I spent over 15 hours writing this guide (as well as taking screenshots and editing them) with the intent of making it the ultimate resource for getting yourself online. When you’re done, you’ll have established a great online presence.
If you want to see some personal website examples before you get started, here’s what mine looks like today:
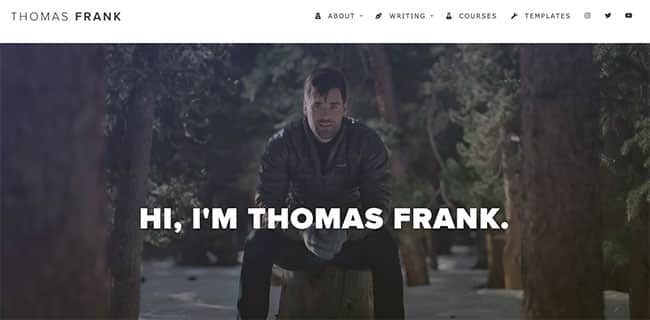
(By the way – if you like my website’s design, later in the guide you’ll find an in-depth video tutorial that will show you how I created it using a free theme. Keep an eye out for that in Step 3.)
For another great example, check out Ashley Diers’ website. Ashley does all the illustrations and graphic design for this website. And she uses her personal site to showcase both her illustrations and lettering work:
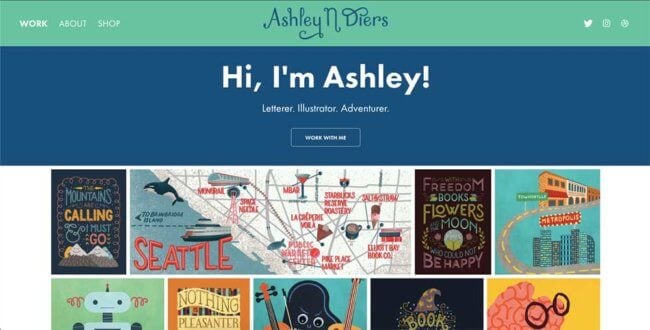
I’ve worked hard to make this guide as comprehensive, yet accessible as possible. It’s a bit of a long read, but that’s because it takes you from literally nothing to having a finished website.
In this tutorial, you’ll learn how to:
- Get a domain name and web hosting for your site
- Easily install WordPress (my website builder of choice) and get all of your content up on the web with no coding knowledge needed
- Make your site look good with a great-looking theme
- Optimize your website’s speed, security and more with plugins and widgets
- Improve your site’s SEO and find resources that can teach you how to take your site even further if you want
You can treat this list like a table of contents; if you’d like to jump to a specific section, just click it. Otherwise, feel free to truck through the whole guide in order.
What you need to know beforehand:
- How to use the internet
- How to follow directions
What you don’t need to know/have beforehand:
- HTML, PHP, CSS, Javascript, JQuery, XML, XSLT, Ruby, Zend, Python, Flash, MySQL, Nginx, Apache, or any other language
- Photoshop, Dreamweaver, or any other program – these can be very useful for customizing things later down the road, but to get up and running all you’ll need is a web browser.
- Kung-fu, Naruto jutsus, or rocket surgery
Seriously, building a website isn’t hard and you don’t need to know any code. Knowing code can be useful for tweaking and customizing things later, but you can get the basics down without knowing so much as a lick of HTML!
Estimated time to complete this tutorial: 1-2 hours (you’ll spend the most time on non-techy stuff like writing your content).
Note #1: If you get stuck at any point in this tutorial and need help, I’d be more than happy to assist you. You can get in touch with me on Twitter or via email. I’m serious – please ask me questions if you get stuck. I’d hate to see anyone go through a bunch of work and not end up with a great-looking site.
Note #2: I recommend some specific products and services in this tutorial. Be aware that these aren’t your only choice; they’re simply what I use personally and recommend.
Full Disclaimer: If you choose to use the domain and hosting option I recommend in this tutorial and click my links to get to it, I’ll earn a commission (though there is no extra cost to you – it will actually be quite a bit cheaper since I’m able to offer a coupon code). I want to be very clear that there are definitely other good choices for your domain and hosting out there. This is simply the one I’ve been using since the beginning, and I’m very satisfied. If you do choose to use my link, thank you!
Alright, enough with the preliminary stuff. Let’s start building your site.
Step 1: Get a Domain Name and Hosting
The first step to building your personal site is to choose how you’re going to have it hosted. There are a number of ways to put up a website. For instance, you could just create a free blog at Weebly or WordPress.com, or even Tumblr.
However, I believe it’s a lot more impressive to have a self-hosted site with an actual domain name (not a subdomain). This will look a lot more legitimate and will show that you’ve taken the time to learn how to actually build a website, which can differentiate you from the crowd.
I’m not the only one who thinks so. One of my favorite entrepreneurs, Srinivas Rao, gave this tip for aspiring bloggers:
“If you want to be taken seriously , then make sure you have a self-hosted WordPress blog.”
So while it’s up to you in the end, I would recommend self-hosting your site. Still, having a free site on WordPress.com or another place if you’re on a tight budget is much better than not having a site at all!
Now, before we get into all the nitty gritty step-by-step stuff, there’s one thing I want you to think about first: your domain name. And the first rule of choosing a domain name is…
Don’t register SailorMoonFreak94435.biz, dummy.
I can’t stress this enough: you need a good domain name. What makes a good domain name? For a personal website or portfolio, I’d recommend sticking to the following criteria.
How to Choose a Great Domain Name
First, if it’s at all possible, make your domain name your first name + your last name.com. That’s seriously the best option for memorability and SEO (aka how high you show up in Google).
If you have a common name (like I do), this will likely to taken already. I certainly couldn’t get thomasfrank.com, so I had to go with thomasjfrank.com instead. If your name is taken, you can throw in a middle initial or maybe even your full middle name if it doesn’t make the domain too long.
You can also use a clever play on your name if none of the above works. For example, my Instagram username is TomFrankly – so I’ve also registered tomfrankly.com.
Don’t use numbers in your domain name, and only use dashes if you absolutely must.
When it comes to domain extensions:
- Use: .com (preferable), .me, .org, .co
- Avoid: .info, .biz, and anything that sounds unprofessional
There are also lots of weird new domain extensions these days, like .limo and .pizza – but my opinion is that going with a more established and recognizable extension will help you avoid confusing people.
Above all, make sure your domain’s spelling is very easy to get correct for someone just sounding it out. This way, you’ll be able to mention your domain easily in casual conversation, and the person you’re talking to will be able to find it without worrying about the spelling.
So once you’ve thought of a good domain name, let’s kick off this whole website-building process by getting your domain and hosting.
Time to Get a Domain Name and Web Hosting.
It used to be that you had to buy your domain name separately from your web hosting. Now, however, you can get them from the same place, right at the same time. Buying them separately is still an option, but it’s so much easier to get them together.
I’m going to use the combined method in this tutorial to keep things simple; however, you can always get in touch with me if you want help setting them up separately (or for anything else).
Note to your wallet: this is the only part of the process that will cost you any money. Hosting isn’t free. However, it doesn’t have to be that costly, either – and I believe the small cost is worth the boost having a website gives to your personal brand and credibility.
There are literally a zillion options for web hosting out there. You can go with a shared account, a VPS, or go crazy and pay for your own dedicated server.
You could even get geeky and host your site from your own computer – though I don’t recommend this as you probably don’t want to deal with the security risks of running a web server, and any time your computer gets turned off (e.g. during power failures and when you have to move out of your dorm), your site will go down. Still, it’s an option.
Since you’re probably a college student and, like me, not swimming in a vault full of money, I’m going to assume you just want something cheap that works.
With that in mind, I recommend just getting the basic shared hosting plan from HostGator. (Again, full disclosure, I’ll make a commission if you buy through this link — if you choose to do so, thank you!)
There are plenty of good hosts out there, so HostGator certainly isn’t the only one you can use; however, I’ve been hosting all my sites through them for over three years and I’ve always been more than satisfied because:
- Their plans are pretty cheap (and, notably, less expensive than premium plans from companies like Squarespace and Wix)
- You get a free domain name (provided that it’s a .com, .org, or .net, you’re a new customer, and you get a 12-month plan or longer)
- There’s almost never any downtime
- I love having quick-install options for installing website builders like WordPress (what we’ll be using in this guide)
- Their support is just plain badass
One time, I needed an obscure PHP server setting changed for a school project, and it was something their level-1 techs couldn’t do for me.
So within 20 minutes of me asking, one of their higher-up system admins not only changed the setting, but also sent me a screenshot of the directories and commands he used to do it just in case I needed to do it on another server in the future.
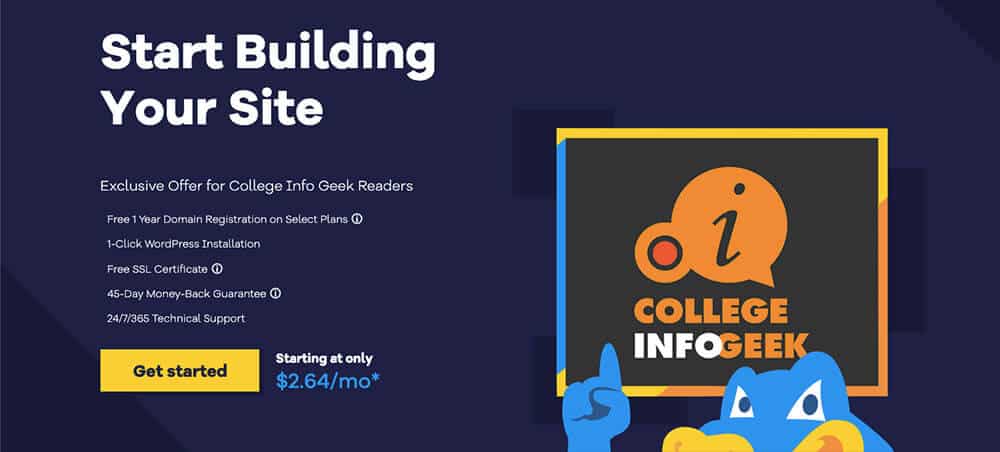
You can also get a pretty good discount.
Since I’ve been with them for several years and am directing this tutorial at budget-conscious students, I asked if I could partner with them to offer a discount. They said yes, which is why you’ll see my bearded mug on the page when you click through.
So, use the coupon code COLLEGEINFOGEEK to get 55.87% off of your initial hosting purchase (or even 62% off if you choose a 3-year plan).
This is actually 30-40% more savings than you’d get with the default coupon code they give you, so definitely make use of it if you choose to use HostGator. (If you clicked one of the sign-up links above, the code should be automatically filled in.)
So yeah. This tutorial assumes you are using HostGator; however if you choose another host, these instructions should be pretty similar to what you need to do.
Head to HostGator and click the big button that says “Get Started Now.” (Again, I’ll make a commission if you buy through this link — if you choose to do so, thank you!)
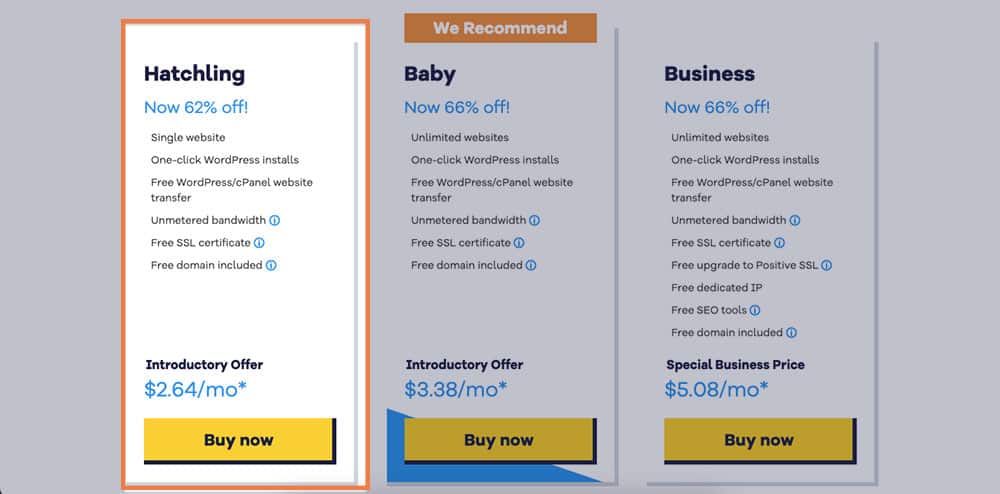
Start your journey by choosing the Hatchling plan, which is the cheapest one and is all you need if you’re just building a single website.
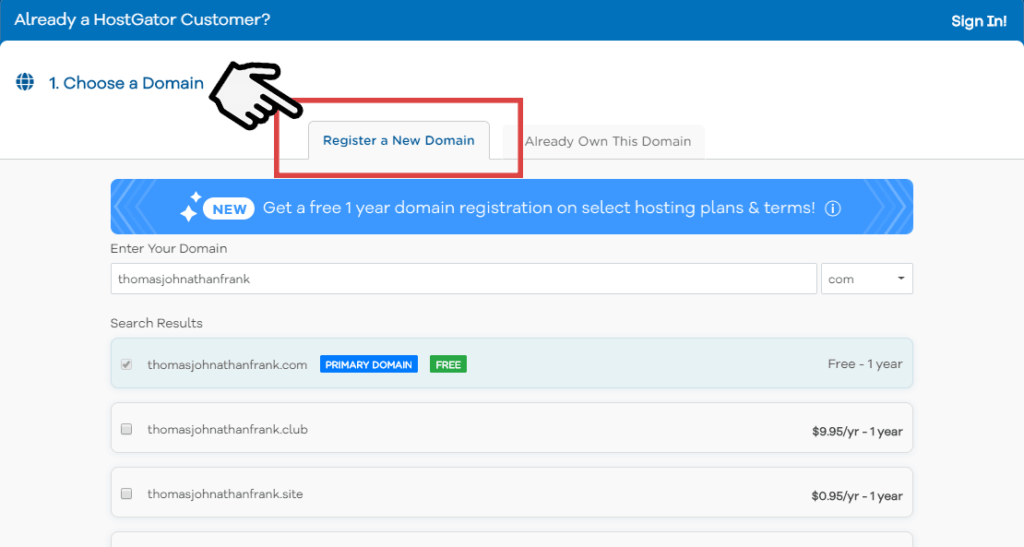
Next, you’ll want to pick a domain name. Assuming you don’t already own one, stick with the default tab Register a new domain, and type the one you’d like to see if it’s available. If it is, you’ll see a screen like the one below! If not, tweak it a bit until you find one that hasn’t been taken.
Also, if you choose a hosting plan that’s 12 months or longer, you’ll be able to get your domain for free for one year. There are a few caveats – it’s only for .com, .net, and .org domains, you need to be a new customer, and you have to buy it at the same time as you buy your hosting – but it’s still a pretty great deal.
Beneath all the domain extension options, you’ll see an option for adding domain privacy protection.
This is a service that prevents your name, address, and phone number from coming up in WHOIS searches. Most people don’t know about WHOIS, and it used to be the case that you could get away with not having it.
Today, however, spammers like to write bots that search the WHOIS database for new domains and then send spam emails to the people who registered them.

As a result, domain privacy protection is something that I recommend adding. However, it’s also an option you can add to your account later on, so if you don’t do it now (or you already signed up and forgot to include it), you’re not out of luck.
Next, scroll down and complete the next few sections:
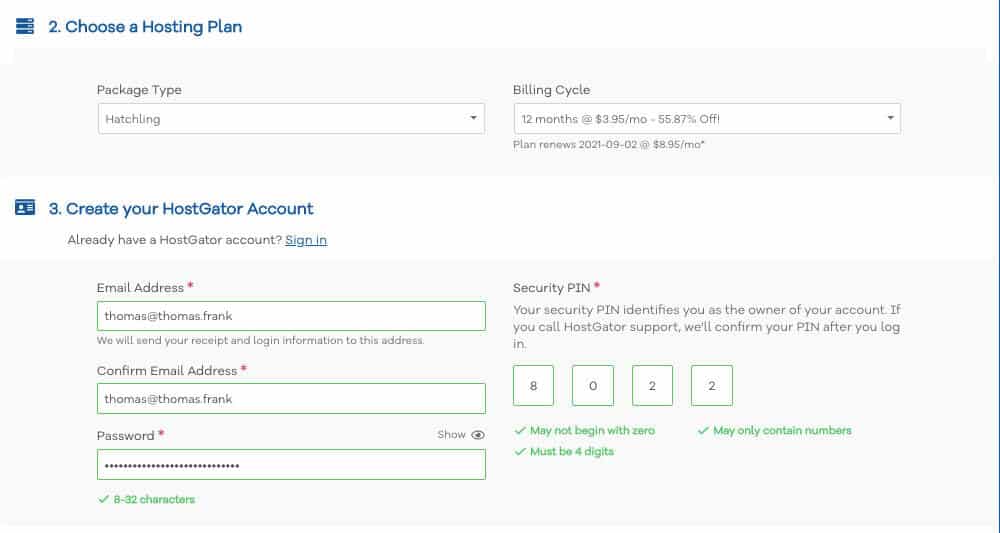
- Confirm that the Hatchling package is selected, and choose how many months of hosting you’d like to get up front. I recommend at least one year.
- Choose a username and security PIN.
- Enter your personal and billing junk.
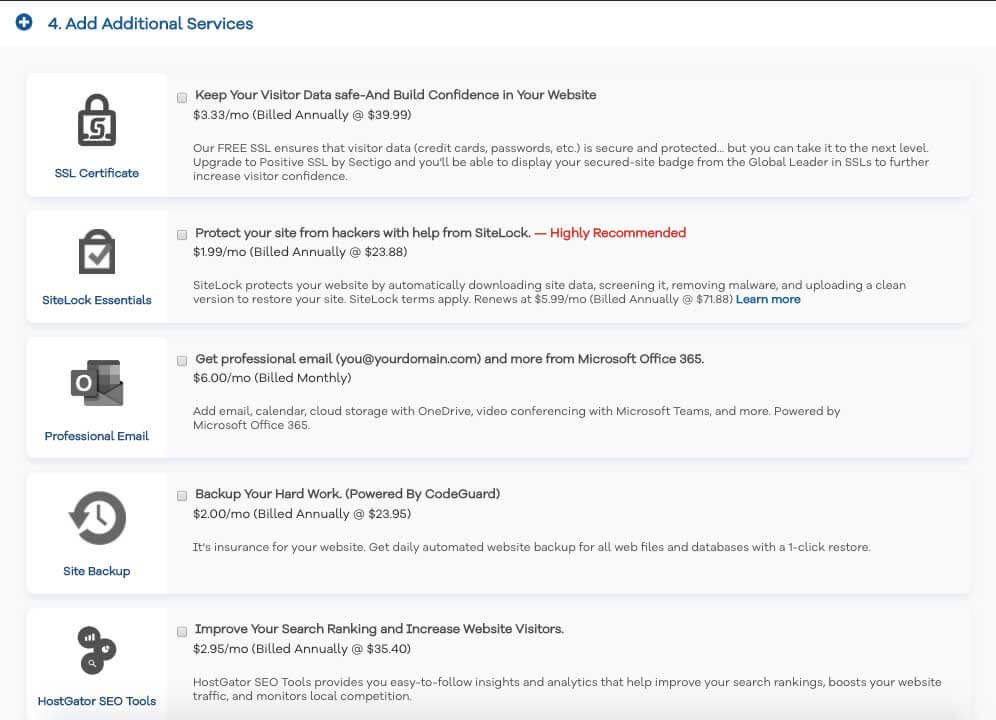
Next, you’ll see a section for Hosting Add-ons. Honestly, I don’t think you need any of these, including the SSL certificate add-on.
To be clear, I do think you should have SSL. This will enable your site to have that little “Secure” lock icon, which you can probably see up in the address bar for this site. Having that there makes your site more trustworthy to visitors.
However, if you read the fine print under the add-on, you’ll see that HostGator already includes a free SSL certificate. The add-on is just an “upgraded” SSL certificate that’s totally unnecessary.
So you can leave all the boxes unchecked to save yourself some money. In the section on Plugins, I’ll show you some ways you can keep your site secure, backed up regularly, and more likely to show up highly in Google search results (or “optimized for SEO” as we web geeks like to say) – all for free.
Finally, review your order to make sure everything’s copacetic, and check that the code COLLEGEINFOGEEK is there to get up to 62% percent off – 42% more than their default code gives you. 🙂

Lastly, hit the big blue button to create your account.
- Get link
- X
- Other Apps
Comments
Post a Comment